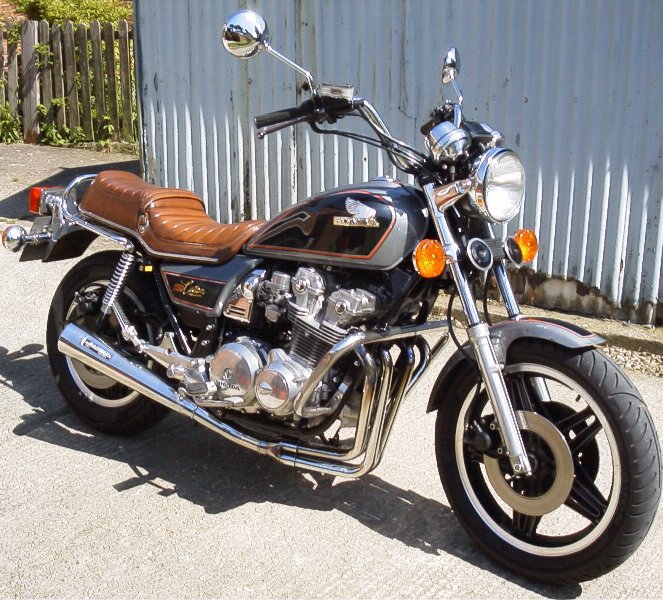
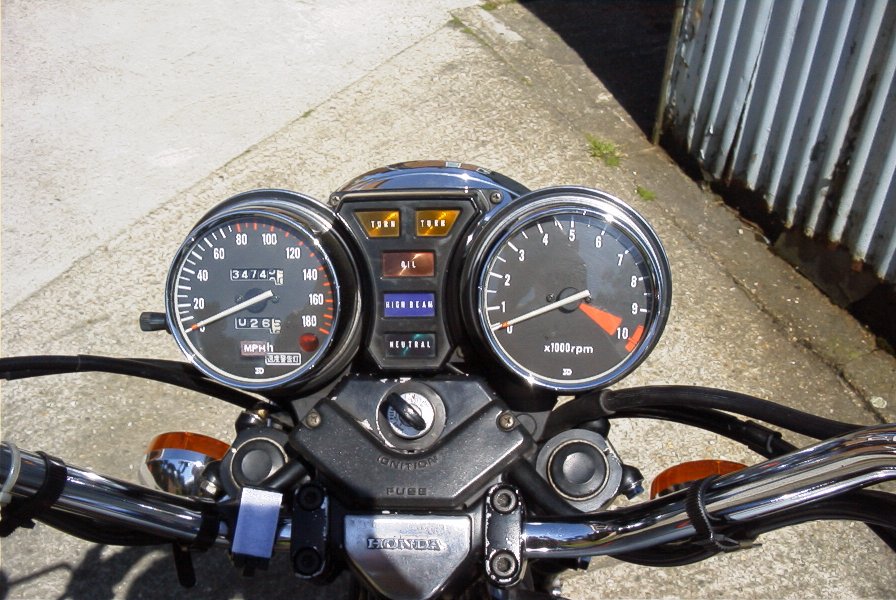
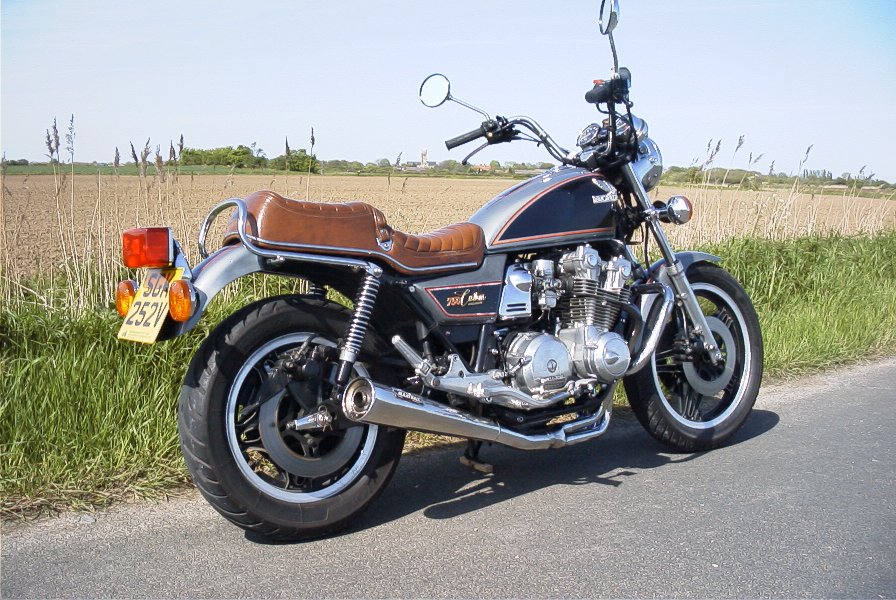
From what I can gather, there were only 1200 of these built. I gleaned this info from a web page, so I can't be sure it's true. If you know the real facts, please let me know. The Exclusive was built in 1980 only. Mine was imported into the UK in 1995 I was told when I bought this machine that it was a US import. However, I have since been told that the engine and frame were never in the US. Looking at the bike and thinking about it, it seems to me that it was imported from Japan as there are stickers on the bike here and there all in Japanese. The speedo is also in KPH.
It is one of the few bikes I have had that folks come up to me in the street and comment on how good it looks. Well, I think looks good too although I am sure it shone a lot better in 1980
29/09/2005 I went out for a 50 mile ride. Got back home and hopped off, stood back to admire my bike before putting it away and DISASTER! The left side panel was missing. It had dropped off somewhere on my ride. With very little outward sign of panic ( I hope), I hopped straight back on my bike and used the GPS ( Garmin Vista C Velcroed to the tank ) to retrace my steps. I did not think for a minute that I would find the panel but thought that if I did not try to find it, I would always regret not having a go. I decided to retrace the route backwards. I rode for 40 miles with my eye on the right hand kerb, looking for a small grey bit of plastic in the grass or smashed all over the road. Eventually I spotted it on the Beverley bypass, laid neatly in the gap between the kerb and white line, completely undamaged. I could not believe my good luck. I think I will nail it on in future.... I reckon half a tank of petrol was certainly cheaper than trying to buy a replacement
24/04/2009 Well it happened again didn't it!! Click here to read about the side panel disaster
Here is some info I found on a Japanese website. It was translated by Google. I have not corrected the English!
A concession to the American taste was done in 1979, with the 750 CB Custom Exclusive. The limited edition brought handlebar raised, bank with two well distinct levels in brown tone, new back mudguard chromed and Comstar wheels with deep black color. In 1981 custom was launched a normal version of style line : 750 CB C, baptized in U.S.A. of Nighthawk, or nocturnal eagle. This would be only CB 750 in the world after the substitution of the esportiva 750 F, in 1983, for 750 CBX F.
HONDA custom. 1200 unit it was limited was marketed the series as biggest. Next year considerably the big trunk, the side back and the front bumper with standard equipment, Similarly 1200 unit it was limited was marketed. Paint and the buff applying where time caught with feature, at plating frequent use of the section going JAS engendered atmosphere. The heart raises concave fast torque with the same DOHC 4 cylinder 68PS as the CB750F / the 9000rpm. If it deposits the body to the steering wheel and the low seat which, curves largely sound of direct 4 X and others does and runs it is highest. It is V however type 2 cylinder zenith, also the American of 4 cylinders is pleasant, is. When somewhere, you happen to see, please use voice. The person who would like to know details the mail.
Jobs Done
- Many hours of polishing, straightening, pulling things to pieces, cleaning them and putting them back together again. Touching up of paintwork on the frame
- 02/2004 Two new tyres fitted. Around this time, right front fork seal replaced. Why both were not done I am not entirely sure
- 15/02/2005 New battery fitted. Hooray, no more bumping it off.
- 03/2005 Right hand side panel decoration repaired. Some 'go faster' stripes stuck on over the flagging existing stripes. They have done the job perfectly although the silver still needs sorting out
- 03/2005 New rear brake pads fitted
- 03/2005 New valve cover gasket, bolt gaskets tach seal and tach drive gasket fitted . Getting the old tach drive gasket out was not a simple job. I read on various parts of the internet that all you needed to do was to insert a wood screw and pull it out. Eventually, I had to remove the gear and mounting from the engine and hold the thing over the gas stove for a few seconds, the old seal then prized out with a bent screwdriver, this process took only seconds after having spent 4 hours trying to pick it out with various implements. The seal had perished into place and was not going to budge. Having fixed these seals, the engine is now oil tight. Until I fiddle with something again :-)
- 04/2005 Speedometer gear changed from KPH to MPH by fitting the Motrax thingumy bob gear wotzit
- 11/05/2005 New mirrors fitted
- 11/05/2005 Replacement rectifier fitted. There was a replacement rectifier fitted to the bike. It was mounted on the toolbox lid as it would not fit in the original place. The problem was that the rectifier is an integral part to the mounting of various other important bits of the bike, so the old one could not be removed. Not very handy at all and a bit unsightly. I won a decent original off eBay for a reasonable price and fitted it with a great deal of rejoicing
- 19/05/2005 Rubber bleed nipple covers for the front brake calipers. Won from eBay. Arrived and fitted 25/05/2005. Fitted one over the swinging arm grease nipple too
- 20/05/2005 Fitted new drive chain. I decided to fit it myself and had to buy a chain splitter/riveter to do it. An expensive tool but probably I will save pennies in the long run, I know my two sons and a neighbour will find it of use too. I preferred to do the job myself as sadly I have found over the years (since Rob Barker Platt my local repair bloke stopped servicing bikes) that the only way to get a job done properly is to do it yourself
- 22/05/2005 A bit or preparatory work for the front fork oil seal replacement. A hex drive socket is required for the top plug, managed to find a hex bar from a puller that will do the job
- 03/06/2005 Renovated the clutch. Using the clutch basket I won on eBay, I have replaced a couple of plates, a spacer plate, the springs (this was part of the problem I think, the old ones were about 2mm shorter than the replacements I had), a splined washer, a clutch nut and a thrust plate bolt (the head broke off one as I was putting it back together (no! I was not turning it too hard, I was using a torque wrench set to 10lb. I was lucky that the rest of the bolt came out of the clutch drum easily )). Before I did this, there was very little play on it. It was either all or nothing and there was a bit of drag. It just didn't feel right. I bought a clutch basket off eBay for not a lot at all (£6.50p), on receiving it I was amazed to find that it was in beautiful condition, virtually no wear on the plates, it looked new. 18/05/2005 I made a tool to remove the clutch basket retaining nut. I used a suitably sized old socket and cut four bits out of it leaving 4 prongs that fit into the slots of the nut. This did the job perfectly. I bought a new clutch cover gasket (received the gasket on 02/06/2005). Didn't use the new gasket as the original was fine. The whole job took me three hours, quite pleased with myself really. Job included an engine oil change of course. Whoever had dismantled the clutch before had not used a fancy tool to remove the clutch nut, it looks like it has been repeatedly hit with a screwdriver and then chewed up. Fortunately the replacement I acquired had a decent one. After the renovation, it feels and works really well, seems to be oil tight, so all in all I think I will mark that one up as a success
- 04/06/2005 Fitted new flipstand rubber. Ordered from David Silver Spares 31/05/2005, arrived 02/06/2005
- 09/06/2005 Microfiche reader won on eBay arrived in reasonable condition, requiring a little renovation to get it in good working order. It is an old reader but the lense is a really good one and well worth what I paid for it I think. Much better than newer similarly priced ones. I acquired from eBay the (almost) right parts microfiche. The one I got is the 1980 CB 750 Custom. Very nearly it. Most parts are the same I think. I asked about having the microfiche printed out or saved to CD. The cost was astronomical, a real rip off. Blow that for a lark. Having the microfiche has made ordering parts a simple task, removing the guesswork
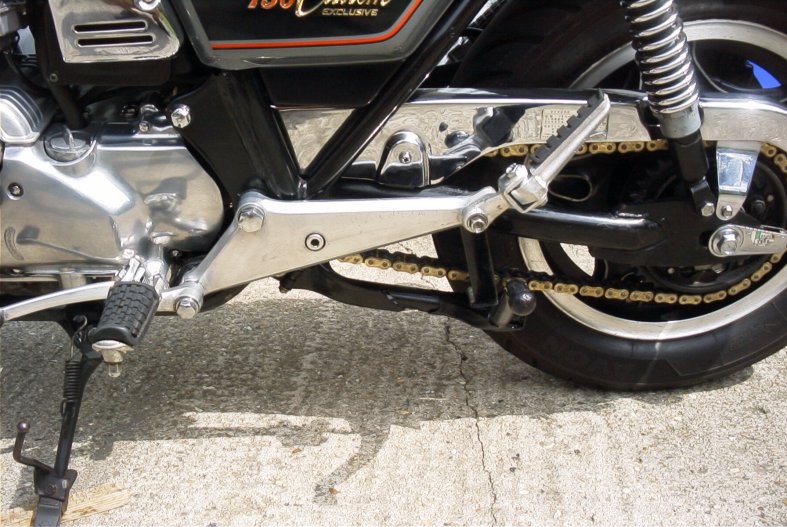
- 21/06/2005 Mainstand won on eBay (02/05/2005) finally arrived. It took 6 weeks and 3 days to come from the US. Cleaned it up, with a wire brush, paint stripper, wire wool and then sprayed with Hammerite. Works a treat apart from the fact it has nothing to rest up against as the exhaust is not there on the left hand side! I assume this is why someone discarded the mainstand in the first place. At the moment, It wants to rest on the chain. Not a good thing really. I will need to fit something on the left side for it to rest against to protect the chain. Should not be too much of a problem as I was aware this was probably going to happen and had been giving it some thought. Nope, it wasn't a problem! I scrounged a piece of metal bar, bent one end over at right angles then mounted it on the rear footrest bolt. Angled slightly backwards and with some rubber at the bottom end (A rubber foot off a BBC computer) to stop the mainstand clattering and damaging the paint. Job done at long last!
- 26/06/2005 Left front fork seal replaced. Here's the lead up to it: Must keep an eye open for some seals. 22/05/2005 Found a 17mm hex bar to take the top plug out of the fork using a puller nicked from my son's toolkit. 23/05/2005 Got the fork seals. For once, the shop was cheaper than eBay. Got the fork oil 03/06/2005. Was waiting for the mainstand fitting. I think my plan is to replace only one seal as the right hand one was done only recently (why just the one I wonder to myself). I shall empty the oil out of them both though, to ensure the same viscosity and quantity is in both. Now I have fitted the mainstand, the leak does not seem to be worth bothering with at the moment but I am sure I will want to do it anyhow before long. Yes, done on 26/06/2005. I replaced the knackered one. All was simple apart from getting the old seal out, it was really well stuck in. I finally budged it using a spanner and piece or rubber! The open end of the spanner fitted onto the underside of the seal. The rubber protected the end of the fork so that I could lever on it. It was dead because the retaining clip had rotted badly and bits from it had got into the seal. I cleaned the clip up and greased it well but I shall get hold of a replacement. I emptied the other fork and refilled it just to ensure the oil quantity and type were the same. All seems well after a quick test to Paull and back
- 27/06/2005 Back mudguard straightened. One of those little jobs I had been meaning to do for years. You may have noticed on some of the older photos of the bike that the number plate and tail light are a bit skewed. This is because there was a bend in the rear mudguard. I fixed it by placing a wooden stick on the back tyre, wrapping a rag around it to protect the paintwork and pulling up on the back of the mudguard with it. This gently raised the sagging side and straightened the bow that was in it.
- 01/07/2005 Fitted a new left fork oil seal retaining clip. No more bits getting into the seal now hopefully. Right hand side fork examined too, this clip was just starting to rot so I cleaned it up and greased it, must keep an eye on them in future
- 01/07/2005 Now and again when the fuel tap was turned, a little petrol leaked out from around the tap area. I did not actually see it do it although I tried to remember to look every time I turned the tap. I discovered it when there was either fuel on my glove or a drip on the carb and starter motor cover. After watching for a month with no leaks, I finally decided that it had fixed itself. Maybe it just needed using
- 01/12/2005 Checked the breakers and various other electrical/ignition things as the bike was becoming more and more difficult to start but OK when warm. It always was a bit cold nosed anyhow. Decided to fit new plugs, HT leads and supressor caps. That did the trick
- 21/02/2006 Front brake pads renewed with FA-30. I had been told that it required FA-31 but David Silver Spares only stocked FA-30. In the event they are all the same (FA-29, 30 and 31) apart from the thickness of material. The FA-30 having 1mm more than the FA-31. They fitted, so they will last longer I assume
- 01/03/2006 The valve in the front tyre perished over winter. The tyre went flat and I had not realised. When I finally did realise, I had the valve replaced but the tyre was still going flat. Dirt had got in around the beading while the tyre was flat. I cleaned it out with an old feeler gauge and all seems well
- 27/05/2006 The right hand side panel had a peg broken off. Someone had removed and discarded the old fixing grommet from the frame and put a bolt there instead, drilling a hole in the side panel so that the bolt would hold it on, aaaarrggh. To fix it, I made a Plasticene mould by pressing a blob on to each side of the peg from the other side panel, pulling off the plasticene and re-joining it. I filled it with resin, 10 minutes later, one peg. Next, I carved a grommet out of a lump of rubber I acquired from a scrap yard a few years ago. I fitted the grommet to the frame, pushed the new peg into this and tried the side panel up to it. It needed just a little trimming off the end for it to fit properly. Next, I needed to glue the peg to the side panel in exactly the right place. With the peg still in the grommet on the bike, I put some resin on to the end of the peg and put some masking tape over the hole in the side panel, then filled it from the inside with more resin. Put some glass fiber matting on to it and then fitted the side panel into place, taping over the panel with masking tape until it was set. Once set, I carefully removed the side panel and put more resin and glass fiber around the base of the peg to strengthen it. A touch of black paint over the repaired hole and all was fixed
- 17/08/2006 The right side fork seal started leaking in a big way, so I replaced it, I also replaced the fork seal retaining clip. That's both done now although the seal had been replaced for me only 3 or 4 years ago. Hopefully it will last this time
- 31/08/2006 Replaced the fork dust seals. I know I should have done it when I replaced the oil seals but I had to order them in. I think that is now 3 times that I have had the front forks to pieces
- 10/09/2006 Vinyl weld to seat cover as one of my repairs had come adrift. Used a little more glue this time
- 19/10/2006 A small amount of mess appeared around the front brake master cylinder. The rubber sleeve over the piston had split and let muck in. I removed the broken seal and cleaned it all up. There appears to be no leak from the master cylinder at the moment. The only replacement I could find came as part of a kit to replace the whole piston assembly costing around £37. As the piston assembly appears to be OK I am loathe to fork out that sort of money for a simple piece of rubber. Instead, I purchased a couple of tap washers, one for the outside end of the piston (near the lever) and one for the inside end (over the circlip end, requiring slight modification of the washer, increasing the center hole size so it just gently touches the piston). This looks as though it will do the job as long as I keep the area clean and greased. I will keep an eye on it and see if it works
- 05/03/2007 Oil and oil filter change
- 08/02/2008 Repaired seat again. A couple of nasty splits appearing
- 27/09/2008 Front tyre replaced after gathering a couple of nasty pieces of metal
- 17/01/2009 Iridium spark plugs fitted DR8EIX. Hoping it would start more easily. Well, it was a bit of a struggle but it did start a little more healthily than with the old plugs. Once going though, it runs a real treat.
- 13/02/2009 Ignition coil wiring bypass carried out. Apparently, bypassing the switches and thin wire used to power the coils can increase performance. I have used a thick wire and 40Amp relay for the job. In the diagram below 'Trigger' is the black and yellow wire removed from the coils, '12v Out' then goes on to the coils and replaces the black and yellow wires. This is a simple modification that can easily be reversed.
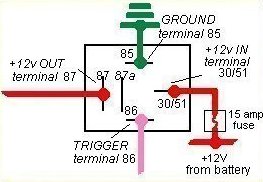
- 21/02/2009 Compression test 1=170 2=165 3=160 4=165 psi Should be 170 plus or minus 14
- 27/02/2009 Engine oil and filter replaced
- 24/04/2009 Disaster struck. One of my own making really too. Lost the right side panel. Full story here
- 10/04/2010 Engine and oil filter replaced
- 11/04/2010 Seat repair again. A little more vinyl weld put into one of the slits on the cover as it is coming adrift again. From time to time I look for a replacement cover but it is an expensive job.
- 12/04/2010 Battery replaced. Addition 24/04/2010. Well that was most certainly the reason the bike was not starting well. It now starts on the first cough every time. From the moment I put the battery on the bike it has started really easily and run much better. It would seem that the battery I put on it in 2005 was duff from the off.
- 10/03/2012 Cleaned the plugs. They were in an awful state after winter.
- 10/05/2012 MOT advisory. Front brake not coming on evenly. Dismantled the calipers, cleaned the pistons and seals and replaced them. There was a largeish blob of goo in each of the calipers. The pistons polished up a treat. Seals still looked as good as new. As the bloke that did the MOT said, there was some muck around the seals that was probaby causing it. Sussed out the part numbers for the bits just in case, noted them here.
Various Part Numbers, sizes and types
- Valve Cover Tacho Drive Seal 91311-425-000
- Valve Cover Gasket 12391-425-010
- Tacho Seal new number:91256-096-651 old number:91211-286-003
- Valve Cover Bolt Seals 90541-425-000
- Front Brake Pads FA-31 (FA-30 Fitted OK)
- Rear Brake Pads FA-29
- Drive Chain 50 530-106
- Spark Plug D8EA
- Mainstand 50500-425-730
- Mainstand pivot 50526-300-000
- Mainstand spring plate 50523-425-000
- Mainstand spring G 95014-71702
- Mainstand spring cover 90125-410-000
- Front fork seals 35x48x11
- Dust Seal (front forks) 91254-434-003
- Ring, oil seal stopper. Microfiche number: 51466-375-000. New number: 51447-KL4-951
- Sidestand rubber 50548-356-700
- Clutch cover gasket 11396-425-306
- Fork oil 10w (source microfiche). Or ATF (source Haynes manual and a couple of references on the internet). Capacity 172.5 - 177.5 cc dry. At oil change 155cc
- Engine oil 10w40 20w50. Capacity after drain 3.5 liters. From dry 4.5 liters
- Brake fluid DOT 3
- Front Brake Caliper Piston 45107-413-003
- Front Brake Caliper Boot 45109-413-003
- Front Brake Caliper Seal 45108-300-003
- Cap for bolt for handlebar top bridge 91456-371-770
- Drive Sprockets Front 18 rear 43
- Miles Per Gallon 45. 10 miles to the Litre
- Tyre pressure: Front 28psi. Rear 28psi single rider to 40psi if carrying more than 200lb
- Oil filter 15410-426-010
- Exhaust Gasket 18291-254-000
- Compression 170psi plus or minus 14psi
- Sidecover grommet 83551-300-000 (four required)
- Sidecover hook 83601-425-870 (two required)
- Battery YB14L-A2
Video
09/05/2010
Photographs
Click on the thumbnail pictures for larger photographs
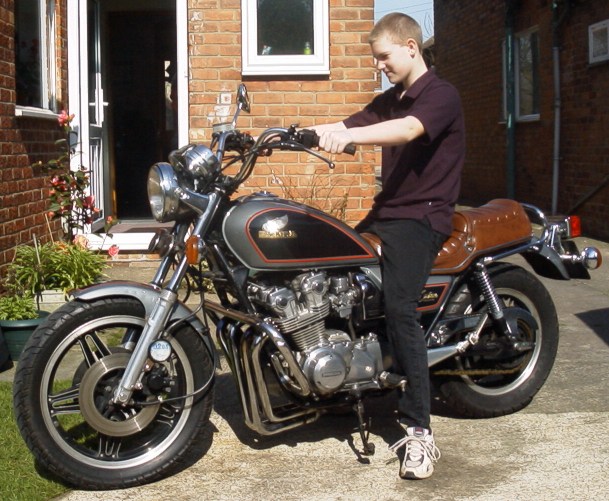
The top photo shows my youngest, Peter. On my other photos pages he is the tiny one sitting on the tank of another Honda
13/March/2002
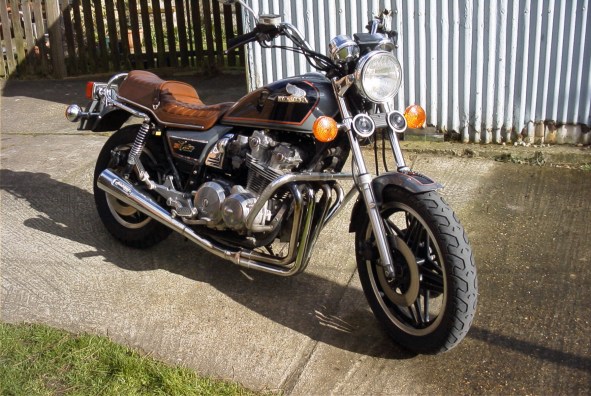
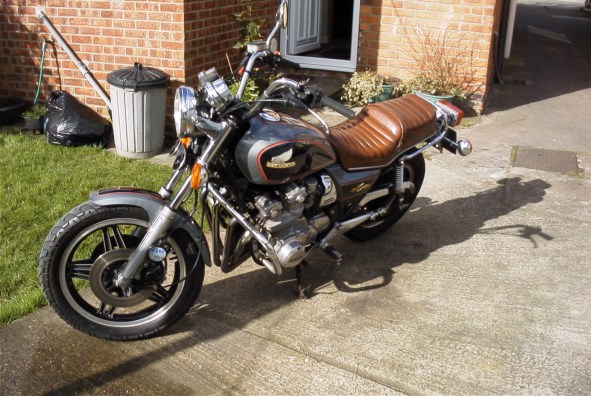
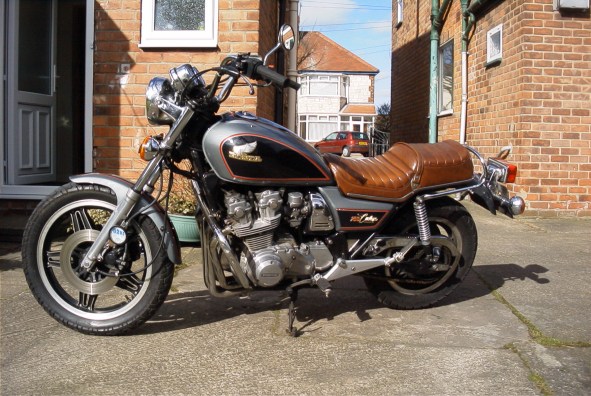
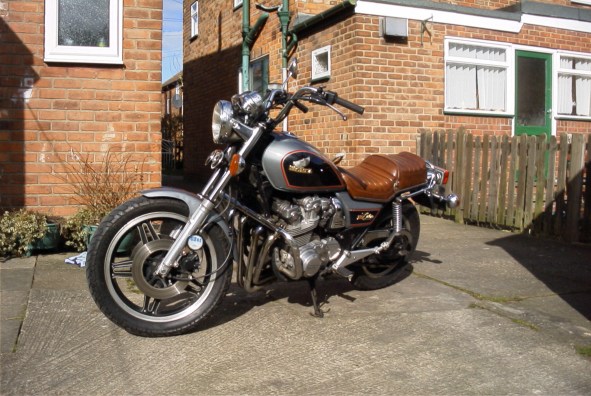
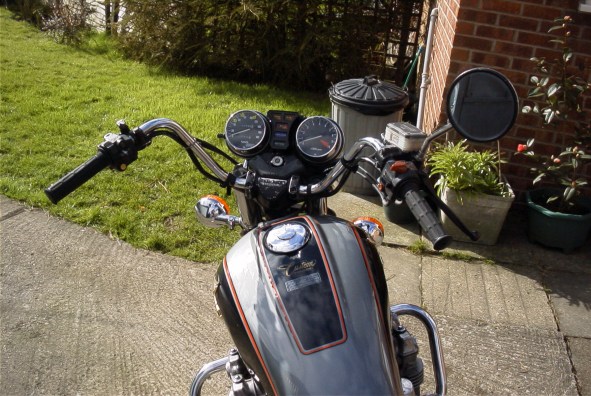
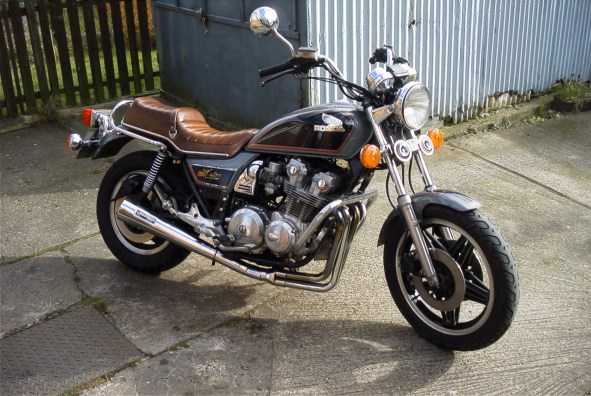
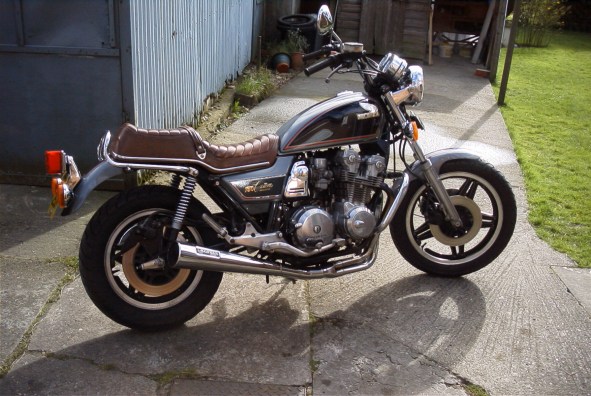
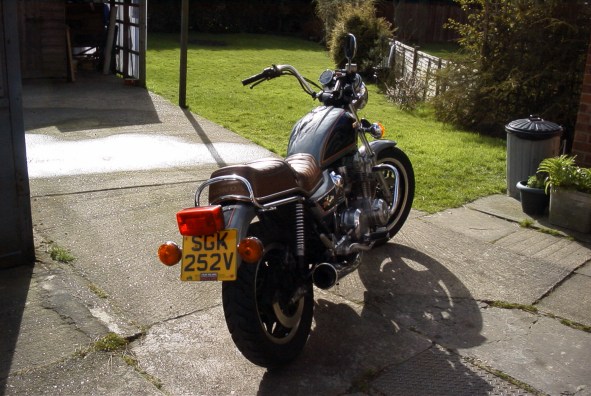
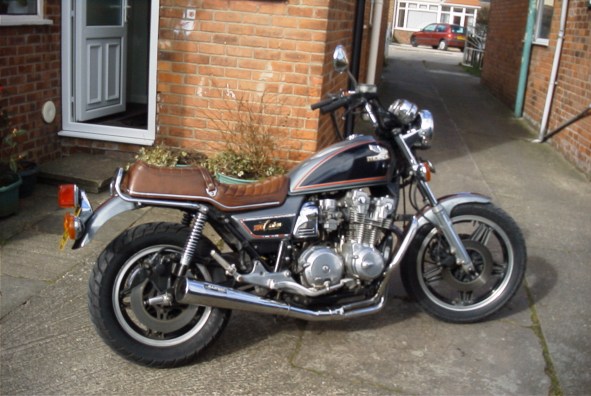
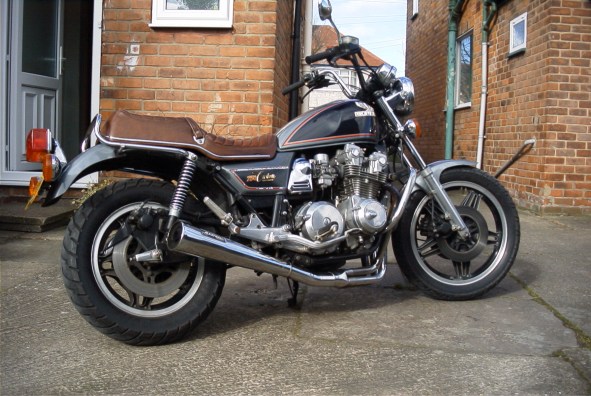
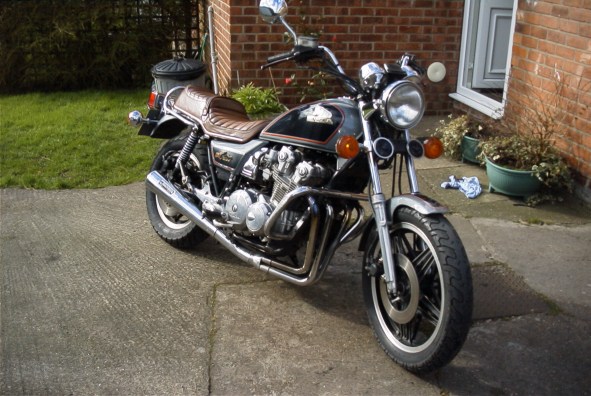
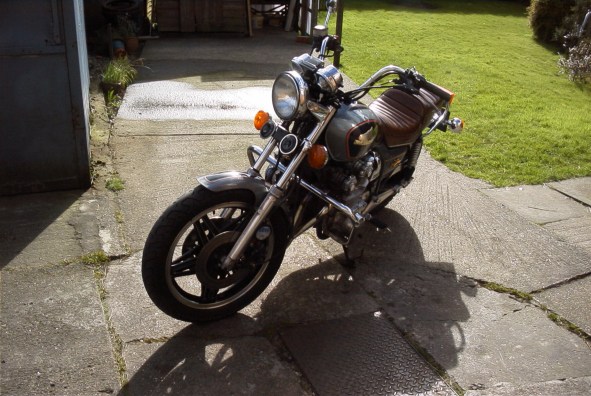
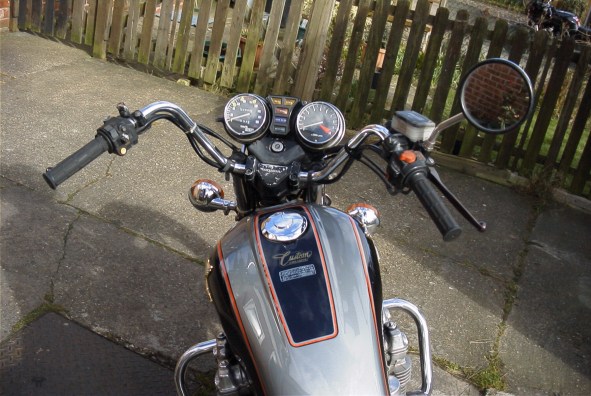
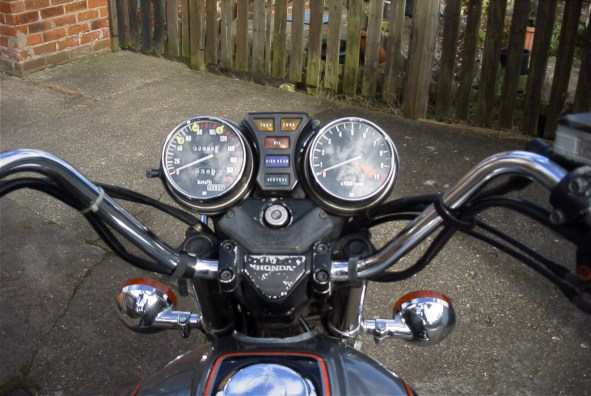
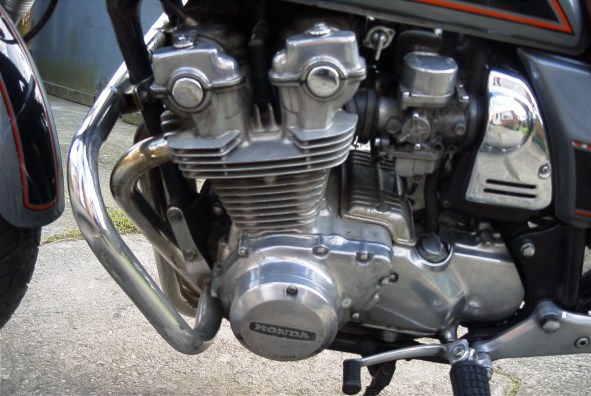
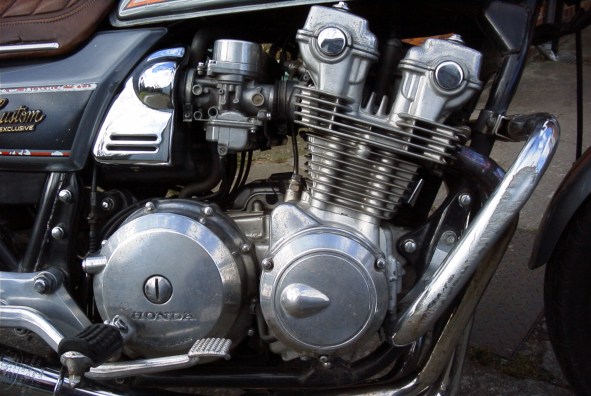
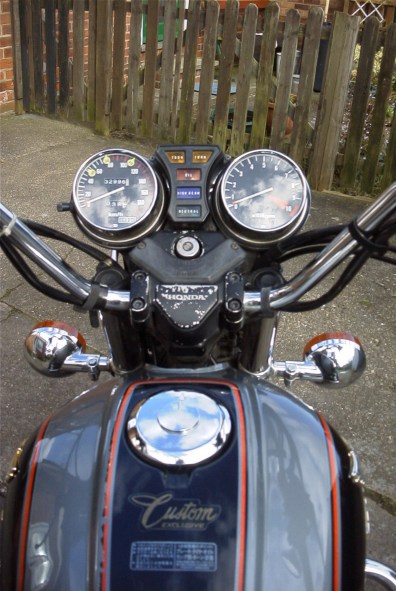
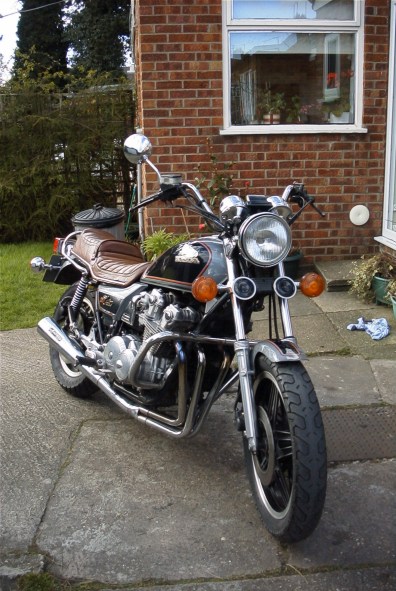
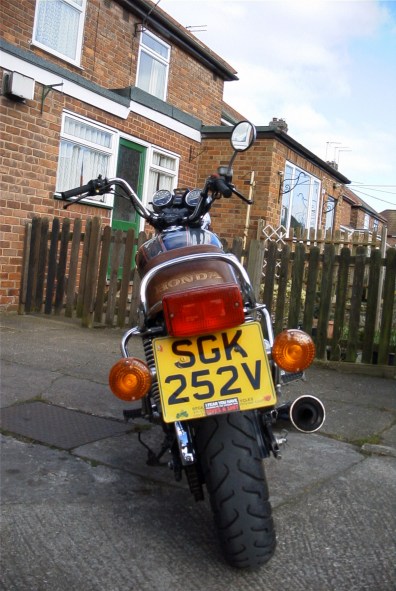
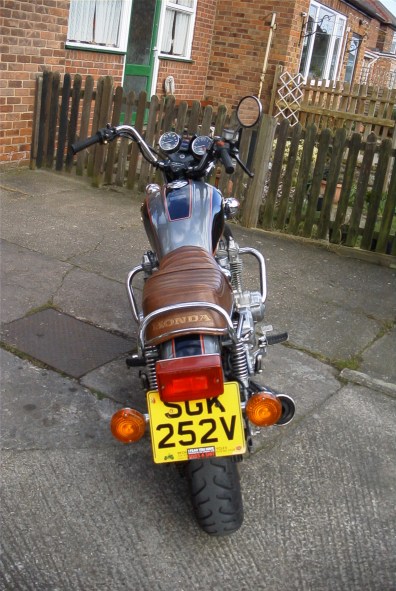
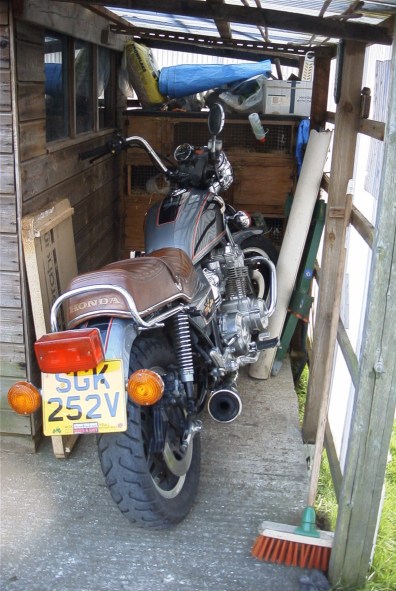
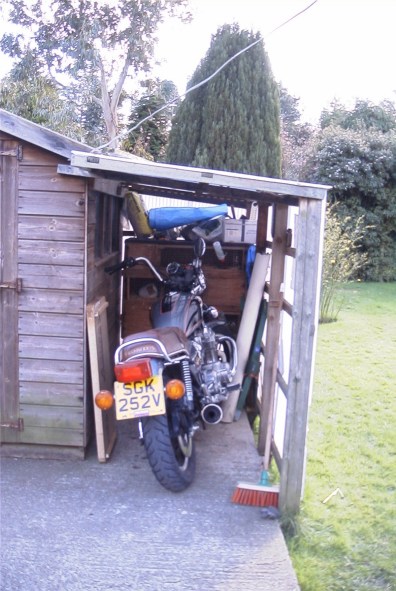
A couple taken in my driveway. 11/May/2005
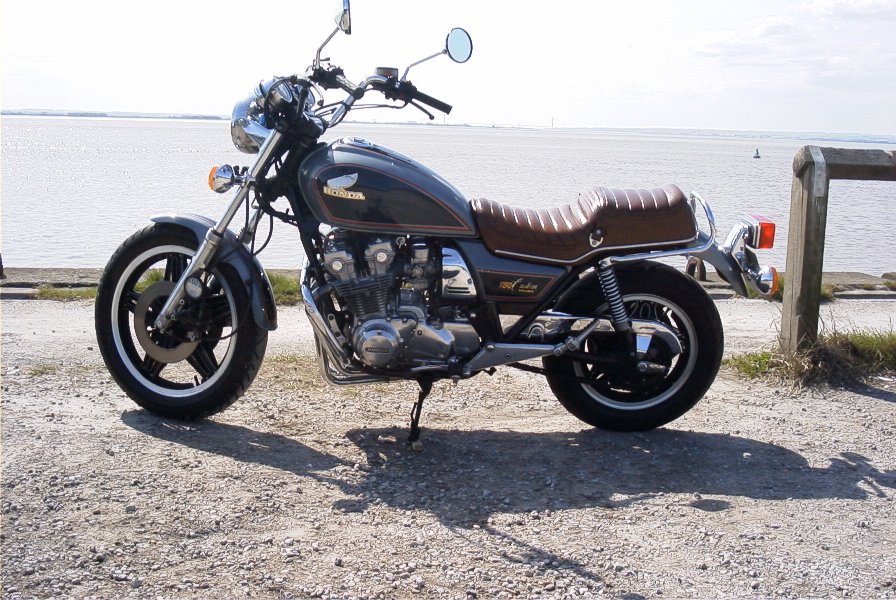
Taken on the front at Paull. You can see the Humber Bridge in the background. 11/May/2005
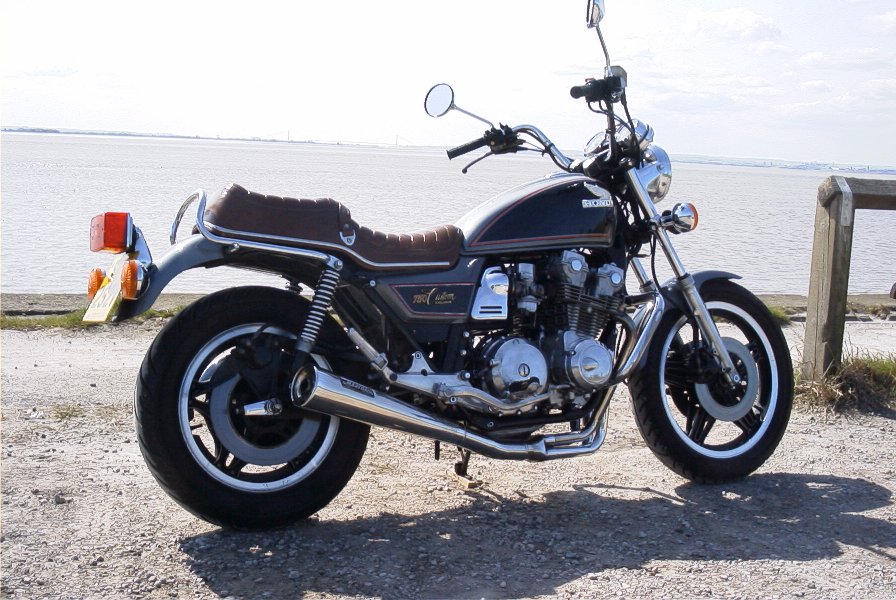
Hedon Church St. Augustines in the background
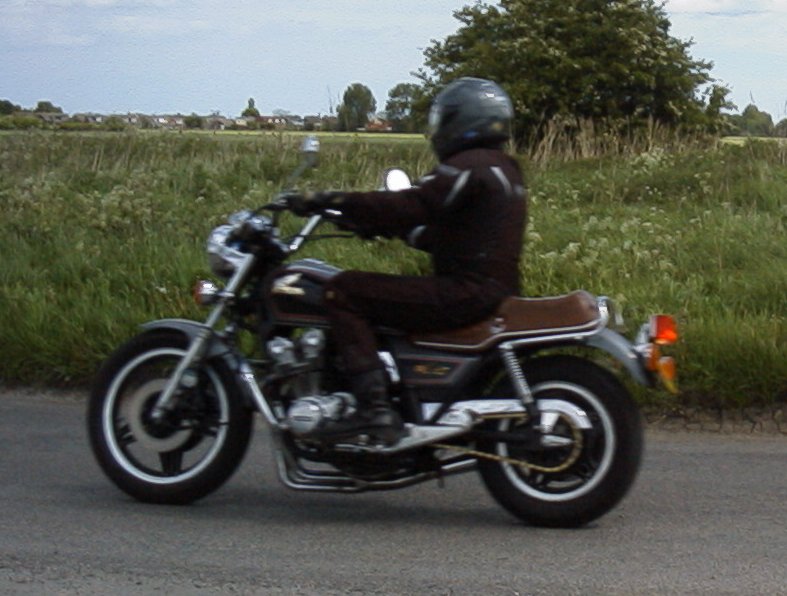
Me, taken by Gill on 21/May/2005
21/June/2005. New Mainstand
The top photo shows my youngest, Peter. On my other photos pages he is the tiny one sitting on the tank of another Honda
13/March/2002


A couple taken in my driveway. 11/May/2005


Taken on the front at Paull. You can see the Humber Bridge in the background. 11/May/2005


Hedon Church St. Augustines in the background

Me, taken by Gill on 21/May/2005

21/June/2005. New Mainstand
